 |
Equipment Used:
|
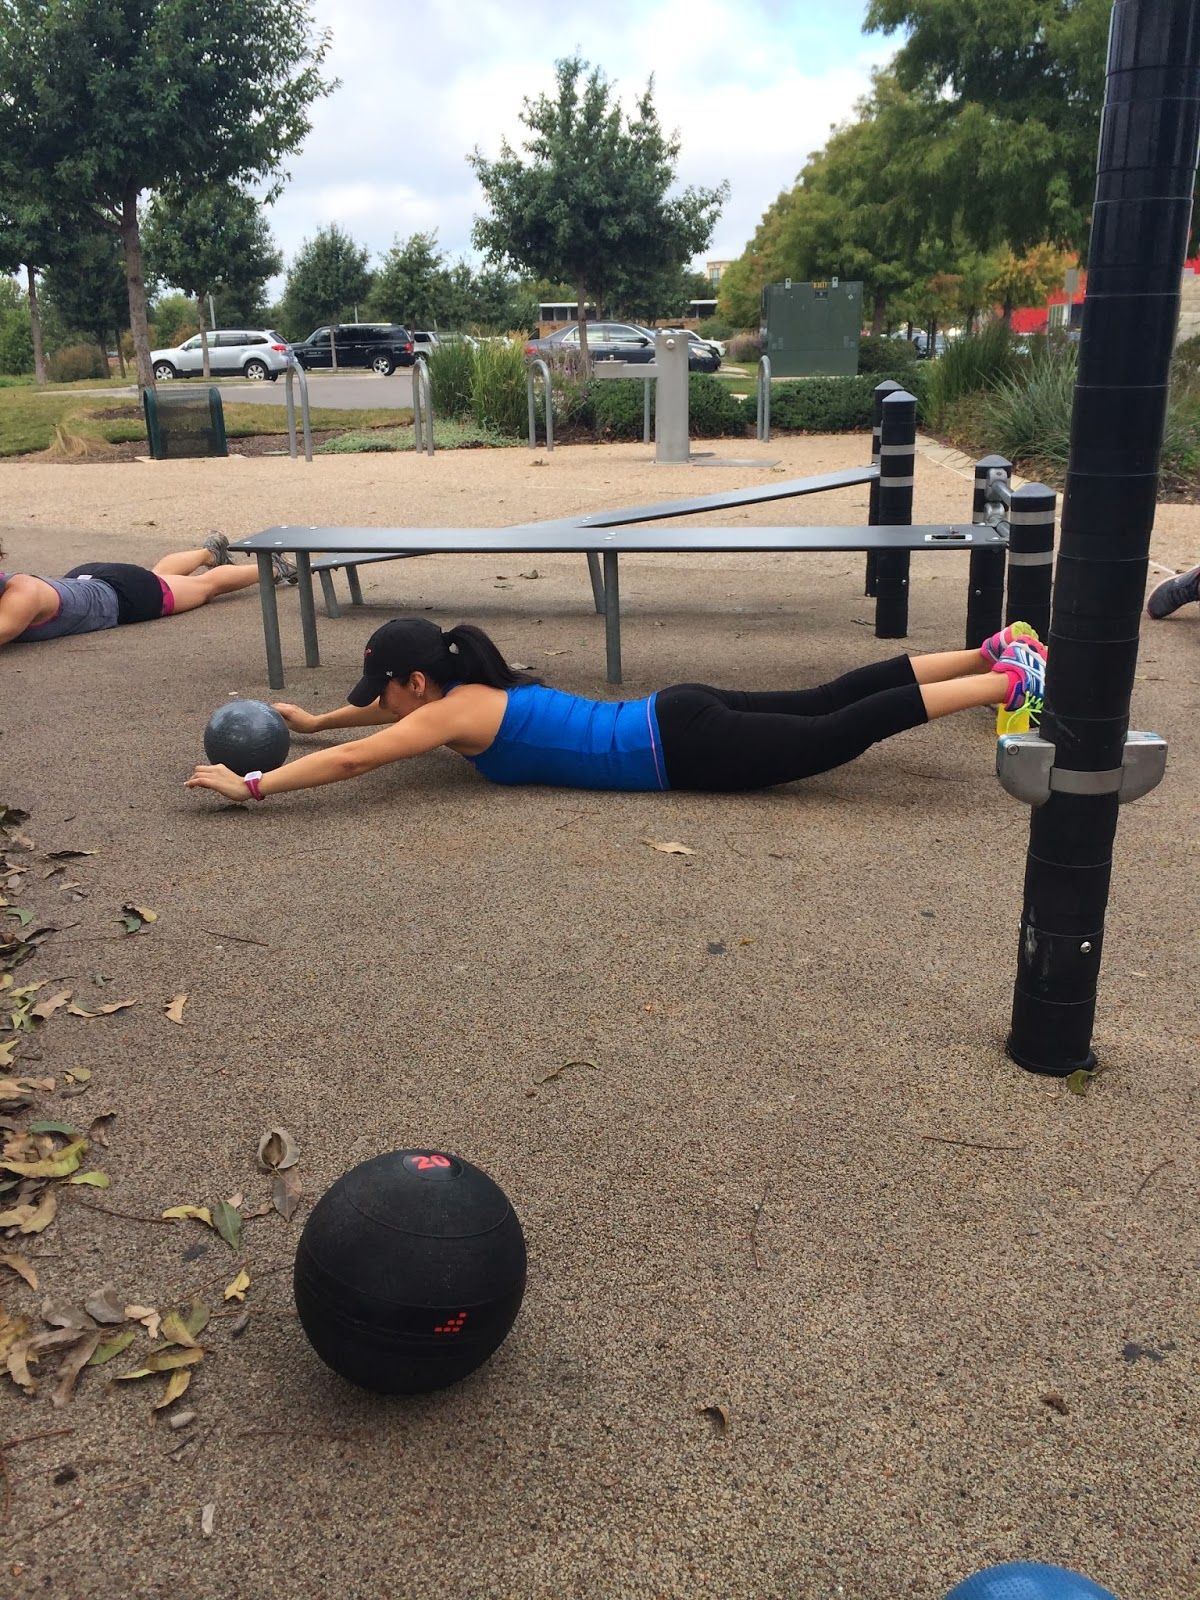
Grab Bag Workout |
|
SUMMARY ***Stretch/Warmup
|
Grab Bag Workout |
|
This workout hits various muscle groups and incorporates strength training alongside plyometric
and isometric exercises. You will need to use basic fitness equipment to complete the circuit
although a couple sets are bodyweight only. To really polish off the workout, we finish with
sled work. Be sure to leave yourself plenty of space to get at it & stretch appropriately
beforehand. Since the equipment used here varies greatly, it would be best to perform the circuit
for reps as opposed to time.
A vast majority of the exercises used here have not been featured in previous workouts. So please take time to review them and practice your form before hitting the workout. Good luck! |
 |
Examples |
|
Dumbell/Kettlebell Double Windmill: Click For Video Example Resistance Band Calf Press: Click For Video Example Lying Leg Lifts: Click For Video Example Renegade Row into Pushup: Click For Video Example Straight Leg Deadlifts: Click For Video Example Tricep Dips: Click For Video Example Overhead Medicine Ball Slam Burpee: Click For Video Example Bicep Curl into Shoulder Press: Click For Video Example Supermans: Click For Video Example Side Squat Jumps: Click For Video Example Plank Mountain Climbers: Click For Video Example Bear Crawl Sled Drags: Click For Video Example Hand Over Hand Sled Pull: Click For Video Example |
| Hydrate, Rest and Recover. Good luck!!! |
CheFit.com
Where fitness is a lifestyle. Organized blogs, social media & more!
Where fitness is a lifestyle. Organized blogs, social media & more!
Friday, December 27, 2013
Grab Bag Workout
Wednesday, September 18, 2013
Hill Workout

|
Equipment Used:
|
|
Tip: This workout can be done anywhere but the
incline helps provide additional difficulty. |
Hill Workout |
|
SUMMARY ***Stretch/Warmup
|
Hill Workout |
|
This workout was created to take advantage of the natural resistance created by exercising
against an incline. Although we are working out using a hill, this circuit could be done on
flat ground (no excuses!). The hill just makes it tougher. Your bodyweight is sufficient
enough to use for this workout but if you want an additional challenge, I recommend using
some form of added weight. A set of K Bands, comfortable ankle weights or a weighted vest can really ramp
up the intensity. The workout is primarily legs and cardio but it does touch on abs &
upper body a bit. Be sure to stretch appropriately.
The exercises are meant to vary in how you use the hill. Every exercise should start at the "base" (bottom) of the incline. The exercises marked "base" are just done at the bottom of the hill. For the Walkouts, you want to "walk" up the incline of the hill. The burpees should be done facing away from the hill & kicking your feet back onto the incline surface of the hill. When doing the sit-ups, face the incline & walk halfway up. Take a seat & start performing reps. Be careful when performing these exercises. They are very common bodyweight movements but it will be slightly more tricky to execute these on a raised & uneven surface. Take your time with them the first set. For the other exercises, perform the instructed exercise while moving up the hill towards the top. Once at the top, lightly jog back down to the base. If the length of the incline is fairly short, you may want to perform several trips to the top to complete a set. If the incline is really long and/or steep, one trip to the top (or even halfway up) may be sufficient enough to call a set. Use your best judgement & don't cheat yourself! The side squats should be done one side leading on the way up & the other on the way down. Alternate which side takes the incline. If the incline is long enough, perform suicides by putting the return points at both halfway & all the way up the incline. For shorter hills, just run to the top multiple times to complete the set. All these exercises have been used in previous workouts but we have video examples linked below to refresh your memory. Take time to review them and practice your form before hitting the workout. Good luck! |

|
Examples |
|
Wide Walking Lunges: Click For Video Example Backwards Run: Click For Video Example Side Squats: Click For Video Example Incline Sit Ups: Click For Video Example Squat Jumps: Click For Video Example Decline Burpees: Click For Video Example Suicides: Click For Video Example Incline Walkout Push-Ups: Click For Video Example |
|
DIRECTIONS Lake Pflugerville Park 18216 Weiss Lane Pflugerville, TX 78660 Find your way to Weiss Ln and approach the park from either the north or south. On the map picture below, the red pinpoint marks the location of the main entrance area. There is a driveway w/ a sign stating "Lake Pflugerville Park". |

|
|
FROM NORTH AUSTIN Toll Road
|
|
FROM SOUTH AUSTIN Toll Road
|
| Hydrate, Rest and Recover. Good luck!!! |
Monday, August 5, 2013
Sagat Cosplay
 |
SAGAT COSPLAY |
| The Costume |
|
Streetfighter II
will always be one of my all-time favorite games. Having graduated high school in 1997, I had
about 6 years of Streetfighter II experience in the arcades during my teenage years. Growing in
San Diego, home to what is probably the largest annual Comic Convention in the US, I received a
lot of early exposure to "cosplay". For you non-nerds, cosplay is short for "costume play" &
basically involves dressing up as your favorite character in a work of fiction. This does not
necessarily mean that you have to draw inspiration from a piece of literature. Cosplay characters
are drawn from video games, movies & other media forms as well.
My interest in cosplay & Streetfighter naturally drew me toward doing Sagat. While not my best playable character in the game, I would have to say he's one of my favorites. Akuma would be the only one to beat him, so look out for my Akuma cosplay someday! I'm always scrambling around Halloween on what to do & this came to me as a pretty easy costume to put together. A set of kickboxing trunks, a ring robe, two hand wraps and ankle braces (not shown) were fairly cheap from Amazon. I sourced an eye patch from a local party store as well as some scar makeup (also cheap). Just under $60 achieved the "Tiger" look! |
 |
| Fitness, Confidence & Cosplay |
|
A confident person does not need to bolster their own ego by putting down others. Generally at any
Halloween party or convention, everyone is there to have a good time & show off their creativity
via costume. Take pride in your work and do not put down the efforts of others. The same sentiment
should exist in the gym. Everyone at your chosen workout facility is there to improve themselves.
Always try to help foster a positive environment and develop a sense of community. In fitness,
with cosplay or whatever hobby you may be into.
Cosplay can involve an element of fitness but primarily requires confidence. Even if you are lacking in the "fitness" part, pour your soul into your costume & wear it proudly. Get immersed in your character. People will look past whatever differences you may personally find between yourself & your cosplay. In the case of most superheroes or heroines, they are usually depicted with killer bodies & often times have greatly exaggerated proportions. Most people cannot even come near the actual rendering of these characters. So do not hold others up to those impossibly high standards, especially if you do not hold yourself accountable to the same rules. Positive feedback on your cosplay may boost your self esteem & help lessen the presence of any body issues. It could be the kick in the pants you need to get into better shape for your next piece. The benefits of your newly found fitness will extend into way more areas of your life than just cosplay. So the next time you're on the convention floor & you see that chubby girl rocking a kick butt Harley Quinn, go tell her how bad ass she looks and get her number. She could be the one to come back next year with a rocking body & a swarm of drooling nerds around her. And even if not, she's probably just a cool chick anyway, which is all that matters in the end (plus, who doesn't love Harley?). |
 |
 |
Wednesday, July 31, 2013
Resisted Running 1
 |
Resisted Running 1 |
| Exercises like resisted sprints & sled pulls/pushes help you develop power which can increase your ability to accelerate. Resistance leg work recruits more hip muscles which allows you to be able to put more power to the ground. Dragging resistance while running also tends to promote arm action which is good for your technique. Correct arm action can improve stride & leg movement, all which help you dust your opponent. |
 |
| We've recently incorporated a Sklz Power Sled, a few parachutes & a harnessed tire to our circuits. The Sled takes standard 2" weighted plates & has an adjustable front handle which can be used to either push or pull the sled. This helps build dynamic power in the lower body. The tire is just an old passenger car tire (free from any tire shop) with a hole drilled into it. A rope is passed through and knotted at the end to hold it into place. The other end of the rope is tied to a generic waist belt. So you just strap up and take off running! We try to perform backwards & lateral runs in addition to standard forward runnning. The parachutes strap to your waist in a similar fashion. They only provide resistance if you are sprinting forward however. |
| Get fast! If you're not first, you're last... |
 |
 |
Monday, July 29, 2013
Inversion 1
 |
Inversion 1 |
|
This was one of our first attempts at dabbling in AcroYoga. It's a basic inversion. The base
lies on their back. The flyer is standing & approaches the feet of the base. The base places
their feet on the upper thigh of the flyer. The flyer bends over while the base grabs the flyers
shoulders. The flyer places their hands on the floor near the bases ears as the base hoists the
flyer in the air. The flyer is basically trying to achieve an assisted handstand. Once the flyer
is vertical, the base slides their feet to the outside of the flyers thighs & removes their
hands from the flyers shoulders.
This pose is pretty easy for most folks to do & doesn't require much strength or flexibility. Kiss is optional! |
| Namaste! |
 |
Tuesday, July 23, 2013
Agility Workout 1
Agility Workout 1 |
 |
Equipment Used:
|
|
Tip: Be creative! This workout utilizes a lot of equipment but a
determined mind can find several ways to make do w/ household substitutions. Several
are suggested in the exercise descriptions. |
Agility Workout 1 |
|
SUMMARY ***Stretch/Warmup
|
Agility Workout 1 |
|
The ability to start, stop and change direction is the definition of agility. This
workout was designed to help increase both raw speed and agility via several high
& low impact exercises. Traditional weight workouts may grant you power but what
use is that strength without coordination or function? If you participate in
almost any sporting activity, some form of agility is usually required for you to
be able to excel. An additional benefit to this style of workout is that it is a
form of cardio. Instead of mindlessly running on a treadmill, you can perform a series
of plyometric exercises, achieve a greater caloric burn and have fun at the same time.
The primary drawback to this workout is that is does require specialized equipment. This equipment is readily available at any sporting goods store & can be used in other workouts as well. If you can't get ahold of the outlined accessories, get creative and improvise. The Cones & hurdles can be replaced w/ any type of marker (i.e. shoes, med balls, coolers, etc). Instead of an agility ladder, you can use twine, shoelaces or just spray-paint/chalk your chosen surface. If you lack a waist harness, tie a rope to your weight & simply use your hands to anchor it as you exercise. You can place your hands on the ground or any slightly raised surface as opposed to a Bosu ball. A parachute is not necessary. If you do have a harness setup, sprint dragging a tire. As for the sled, that is a hard one to replace. A cart/wagon filled with weight would work as a substitute however. Once you have figured out the equipment setup, lay out each "station" w/ enough room in between to safely exercise. You can use a timer and perform each station for a set time period (i.e. 30-60 seconds). An alternate method would be to run through each station continuously & rest at the end. Wait a couple minutes and then repeat. Video examples are linked below. These are all new exercises so take time to review them and practice your form before hitting the workout. Good luck! |
 |
Examples |
|
1A - Ladder Push-Ups Video Example Begin in a push-up position at one end of the agility ladder. Perform a push-up and return to the starting position. Move your leading hand and foot over to the next rung of the ladder, followed by the lagging hand/food. Perform the exercise on your knees if you need to. Repeat push-up exercise. For an advanced version, lower into push-up position and push your entire body up and over to the next rung. Repeat until you reach the end of the ladder. 1B - In/Out Hand Shuffle Video Example Position your body with one hand and one foot on either side of the agility ladder starting in push-up position. Move one hand at a time into the rung of the ladder. Return to starting position by moving one hand at a time back to the outsides of the ladder. Try to move as quickly as possible while performing this exercise. |
|
2A - Ladder In In Out Out Video Example Start at one end of the agility ladder. Moving as quickly as possible, put both feet into the first rung of the ladder, one at a time. Then move them one at a time to the outside of the rung. From the outside of the rung, move your feet one at a time into the next rung of the ladder and repeat. Once at the end of the ladder, without turning around, perform the same pattern moving backwards toward your starting position. 2B - Ladder High Knees Video Example Start at one end of the agility ladder. Bring each knee into your chest (at least to waist height), making sure to step into each rung of the ladder as you move toward the other end. Perform this exercise as quickly as possible. |
|
3A - Tire Backwards Run Video Example With a tire (or other weighted object) tied around you waist using a stability belt, start with legs shoulder width apart and knees slightly bent facing toward the tire. Run backwards from one marker to another (distance can vary) as quickly as possible while keeping your balance. 3B - Tire Lateral Side Steps Video Example With a tire (or other weighted object) tied around you waste using a stability belt, start with legs shoulder width apart and knees slightly bent facing sideways. Shuffle laterally from one marker to another (distance can vary). To increase the difficulty of this exercise, move in a Grapevine motion, crossing one leg in front of the other and alternating as you move along. |
|
4 - Three Cone L Drill Video Example Setup three cones in a "L" formation. Evenly spaced, about 5 yards apart. Start a cone that is not in the "elbow" of the "L". Sprint to the middle cone, touch the ground & then run back to the start cone. Once you reach the start cone, pivot and then run back to your middle cone. This time cut around the cone & head towards the last cone. Be sure to cut toward the inside direction of the last cone. Run around the last cone & head back to the middle cone. Run around the outside of the middle cone & power back to the start cone. |
|
5 - Suicides Video Example Place at least three cones in a straight line equidistant from each other (at least 10 feet apart). Begin by sprinting to the first cone and returning to the starting position. Next, sprint to the second cone and return to the starting position, followed by the third. |
|
6 - Centipede Push-Ups (Walkouts) Video Example Begin in standing position with feet together. Reach down toward your toes (it's ok if you're not able to reach your toes) and place your hands on the ground in front of you. Walking one hand out at a time, extend into push-up position. Perform one push-up, and then begin walking one foot at at time into your body until you have returned to starting position. Stand up straight and repeat. |
|
7 - Crab Walk (w/ Sit Ups) Video Example Place four cones in a square approximately 15 feet apart (distance may vary based on difficulty). Beginning at one corner, sit on the ground with legs slightly wider than shoulder width apart and both arms placed behind your butt. Lift your pelvis off the ground, placing your weight on your hands and heals. Walk backwards on all fours to the second cone in the square, then proceed sideways to the third cone. From the third cone walk forward back to starting position. Perform 10-15 situps (vary based on level of difficulty). Repeat. |
|
8 - Alternating Knee Planks (Side Crunch) Video Example With the flat side of the Bosu ball facing up, place one hand on each side with your legs stretched behind you in plank position. Bring your right knee into the left side of your chest, twisting at the waist, and return to starting position. Repeat the motion with your left knee to the right side of your chest. For a more difficult version, bring your knee in and extend it outward under your body. |
|
9 - Mini Hurdle Lateral Two Steps Video Example Beginning at one end of the mini hurdles, step over the first hurdle one foot at a time placing both feet in between the first two hurdles. Repeat as you travel down the line of hurdles. Run back to the beginning and repeat as quickly as possible. |
|
10 - Parachute Sprints Video Example Perform sprints, or runs of various lengths depending on level of difficulty with speed chute attached at the waist. |
|
11 - Sled Push/Pull Video Example Keeping knees and elbows bent, push the sled to a preset "finish line." Turn the sled around and pull it in reverse position back to the start. |
| Hydrate, Rest and Recover. Good luck!!! |
Thursday, July 11, 2013
Workout: Deerpark Circuit 3
Workout: Deerpark Circuit 3 |
 |
Equipment Used:
|
|
Tip: Keep the intensity up! |
Circuit #3 |
|
SUMMARY ***Stretch/Warmup
|
Circuit #3 - Hope Solo Workout |
|
This circuit is based on Hope Solo's "15 minute workout". All of the exercises are demonstrated
via Nike athletes. The workout is designed to be intense and executed in bursts of
activity. If done correctly, you should be dripping with sweat and be able to maintain an
increased heart rate. The exercises touch on all muscle groups so you should feel it
everywhere once done. If using a timer, try to clear out an area sufficient enough to
be able to perform every exercise. Have your equipment (dumbbells/med ball) readily available
within arms reach. Set the timer to anywhere between 15-30 seconds and roll through each
exercise. Once done, rest and hydrate for a few minutes and then repeat the round. You can decrease
the timer time each round if needed. Try to see how many "rounds" you can complete before becoming
completely gassed. *** If not using a timer, you can perform a traditional workout by
assigning a rep/set amount to each exercise.
The exercises used here vary as far as the equipment needs. Dumbbells are used in some, while others only require bodyweight. Examine the example videos and use your best judgement to decide what is needed for your own individual needs. A medicine ball is not required but works better for a few exercises. If possible, having various weights of dumbbells will help you maintain a maximum amount of effort each round. A great portion of these exercises have not been used here before. Video examples are linked below so take time to review them and practice your form before hitting the workout. Good luck! |
Examples |
|
Toe Taps: Click For Video Example Tricep Push-Up into Frogger: Click For Video Example Full Extensions: Click For Video Example Sumo Squat Press: Click For Video Example Cleans: Click For Video Example Opposite Arm & Leg V-Up: Click For Video Example Side Lunge: Click For Video Example Push Up to Plank Row (Man-makers): Click For Video Example Rollbacks: Click For Video Example Side Crunch to Burpee: Click For Video Example |
| Hydrate, Rest and Recover. Good luck!!! |
Tuesday, June 18, 2013
Workout: Deer Park Circuit 2
Workout: Deer Park Circuit 2 |
 |
Equipment Used:
|
|
Tip: This could also be modified for indoor use however, just get creative! |
Circuit #2 |
|
SUMMARY ***Stretch/Warmup
|
Circuit #2 - Leg Nuke |
|
We decided to start our own Manhattan Project with the purpose of bombing your legs!
Our project is not atomic but I guarantee your quads will be burning as if they
were irradiated after this workout. As opposed to some of our other workouts, this
one is rep-based. You still want to be mindful of time but this is to monitor your rest
periods. You want to keep them as short as possible to keep your leg pump high.
The workout is essentially plyometric so move quickly but don't sacrifice form for speed. Keep rest periods at a maximum of 30 seconds. You want to aim to complete the entire "cycle" as fast as possible. Once the cycle is complete, take a longer rest (1 - 3 minutes) and then hit it again. You should be able to finish 3-4 cycles and feel the burn. Each exercise can be done with just bodyweight but you can use a set of dumbbells or a resistance band to add stress. Your legs are the largest muscle group in your body and can take the extra weight. If you start to tire when using the extra weight, just switch back to bodyweight to finish out. This allows a group of people w/ varying degrees of strength to all workout together. Most exercises have been covered by us before but there are video examples below to refresh your memory. There are a few new exercises that may prove very difficult initially. The videos below for those exercises include a "progression" to help you work up to the actual exercise. Use the modified versions explained in the progression initially. |
Examples |
|
Jumping Jacks Click For Video Example Walking Lunges: Click For Video Example Squat Presses: Click For Video Example Split Squats: Click For Video Example Pistol Squats: Click For Video Example Squat Jumps: Click For Video Example Box Jumps: Click For Video Example Calf Raises: Click For Video Example |
 |
| Hydrate, Rest and Recover. Good luck!!! |
Thursday, June 6, 2013
Workout: Design
Workout: Design |
||||||||||||||||||||||||||||||||

|
||||||||||||||||||||||||||||||||
Designing WorkoutsIf you are brand new to working out, I suggest finding a knowledgeable friend or enlist a trainer to "show you the ropes". It's important to start slow and take your time to learn various exercises and proper form. Once you are comfortable with your gym and the equipment available, you can progress on to customizing your own workouts. When creating your own workout routines there are several things to consider.Goal You need to have an overall goal that you are shooting for and train accordingly to help achieve that goal. No one style of training is superior to another but there are types of workouts that are better suited towards specific goals. Your goal does not have to be specific however. "To keep in shape" is as good a goal as something like "lose 10 lbs". Goals can also change over time. As your goals change, be sure to step back and examine your current training routine. Make adjustments as needed to suit your new goal. Time Working out takes time! Due to work, family, school or a number of other reasons, you may not have as much free time to workout. Be realistic about how much actual time you will devote to your routine. Do not set yourself up for failure by creating a 6 day routine that you don't have time to complete. Figure out how many days you can actually make it to the gym and design your routine around that schedule. If possible, make your routine flexible enough to handle unexpected life events interrupting your schedule. Treat the gym as an important meeting, make it a priority! Also remember that the more time you put in, the better your results will be. Capability Take into account your age, current health and any existing injuries or limitations when creating a workout. Use this as a guide to setup the appropriate amount of rest days between workouts. Also avoid any exercises that may aggravate nagging injuries. Look for stretches and physical therapy exercises you can do to bolster or strengthen your weak areas. You may have naturally stronger or weaker muscle groups. For weaker groups, be sure to add in some extra sets/reps to get them caught up. Do not completely ignore your strong areas but try to use compound exercises to strengthen the surrounding, supporting muscles to that group simultaneously. As you grow stronger, you can decrease the amount of rest between workouts and also in between sets. Constantly test your ability and "push the envelope" if you want to continue to see growth. Body Type Everyone is different and therefore may respond differently to training. There are three basic bodybuilding types: Ectomorph, Mesomorph & Endomorph. (Read Here) It's important to figure out which one you lean toward and train to suit your frame. This will also affect how much cardio you need and your dietary habits. Inspiration Once you figure out your body type, it may be helpful to find a person who represents your goal. Ensure that this person is of a similar body type so you can maintain a realistic expectation. Study your chosen person and try to emulate their training and dietary methods. If your goal role model is a professional bodybuilder/model/etc, do not attempt to use their exact routine right off the bat. Pros usually have years of experience working out and often have extreme discipline when it comes to supplements and diet. A person off the street may not be able to deal with a strenuous routine. What you can do is take pieces of their routine and apply it to your own workout as needed. I like going to Cut And Jacked and browsing their listing of workouts from pros. I take bits and pieces from there to form my own routines. It is also useful for switching up your workouts from time to time so your body keeps guessing. |
||||||||||||||||||||||||||||||||

|
||||||||||||||||||||||||||||||||
Split vs Full BodyThere are two basic types of workout routines: Full Body and Split. Depending on your goals and the time you have available to workout, one may be better than the other. Again, no one method is "better" than another. It's all about finding out what works best for your body and your schedule.Split Split workouts break the body into individual muscle groups that are trained during different workout sessions. It's up to you how far you want to break down the groups. In the next section we will give some examples of different splits. This style is best for "molding" your body as you can focus on specific areas. It also is the best for building muscle as you can devote an entire session to exhausting a muscle group. This style is not best for burning calories as it's usually doesn't include rapid movements. Skipping a workout also means that a particular muscle group gets ignored during a week. This usually must be made up and shouldn't happen often. If you want to build muscle and have ample time to devote individual areas, use this style of training. Full Body Full body workouts encompass the entire body as one big muscle group. You do several exercises for both upper and lower body during one session. The good thing about this type of workout is that if you happen to skip a day, you are not leaving out a muscle group like you would with Split training. If you are just starting out or only have time to workout intermittently, this is a good way to go. It also is great for folks who are focused on cardio or running events. By keeping the intensity up and decreasing the amount of rest between sets, you can maximize calories burned and burn a lot of fat. This makes it ideal for those trying to lose weight. If you are into building specific muscle groups or bodybuilding in general, you should stick to split training. There are pros who have made tremendous progress doing variable full body workouts but for the average person, there is a big risk of injury and overtraining. |
||||||||||||||||||||||||||||||||
Example Workouts
|
||||||||||||||||||||||||||||||||

|
||||||||||||||||||||||||||||||||
| Lift Safe & Lift Heavy!!! | ||||||||||||||||||||||||||||||||
Wednesday, June 5, 2013
Nutrition: Paleo Pancakes
Nutrition: Paleo Pancakes |

|
Recipe
|
Directions
|
ReviewI love these pancakes. They are fast to make and totally guilt-free. A fast way to get in your protein and also a good amount of potassium. It's also vegetarian friendly, low-carb and gluten-free. Try making some for your friends and loved ones to see if they can even tell the difference. Tips: *** If adding in additional fruit (or any other soft substance), you will probably need to balance it out w/ additional banana slices to maintain a thick consistency in your "batter". *** Try some finely chopped greens! |

|
Thursday, May 23, 2013
Workout: Mueller Lake Park Circuit 14
Workout: Mueller Lake Park Circuit 14 |

|
Equipment Used:
|
Circuit #14 |
|
SUMMARY ***Stretch/Warm-up
|
Circuit #14 - Med Ball Madness |
|
This circuit was created to foster teamwork and camaraderie among our workout group by focusing on partner
exercises. Using a minimal amount of equipment, we utilize a partner to create additional resistance. If you
lack a partner or have odd numbers in your group, the exercises can be modified for solo performance as well.
When choosing partners try to match people who are of similar weight and/or physical ability. While performing
exercises, communicate with your partner to coordinate each movement. Use good form and encourage one another
to give it 100% during the circuit.
Certain exercises may require a slightly longer set to get enough work for both partners. Somewhere between 30 seconds to a minute for most. If you can, bring several different types of resistance bands and medicine balls. You could also use a sandbag or large diameter medicine ball (wall ball) for a couple exercises. Use your imagination and make replacements as needed. You will need a good amount of space to perform the exercises so clear out ample room. All of these exercises are just variations of familiar exercises. Descriptions and video examples are linked below so take time to review them and practice your form before hitting the workout. Good luck! |
Examples |
|
1 - Squat Throw/Press Video Example Stand with feet shoulder width apart holding a medicine ball w/ both hands. Perform a traditional squat. When returning to standing start position, toss the medicine ball above your head. Catch the ball as you return to a lowered position for your next rep. Optional: If the ball is too heavy or you become tired, just press the ball instead of throwing/tossing it. If that's still too much, skip the throw/press altogether and just squat. |
|
2 - Double Crunches Video Example Lie flat on the ground w/ a medicine ball. Hold the ball w/ both hands and extend your arms behind your head so that the ball rests on the ground. Bend at the knees so that your legs are raised off the ground and are at a 90 degree angle. Feet are together. This is the start position. Raise your torso, arms and the medicine ball up. Move your torso toward your legs while swinging the medicine ball over your head and resting it on your raised shins. Now lower your torso and and swing your arms back to the start position. As you do this, leave the medicine ball on your shins and extend your legs outward. They should go from being at a 90 degree angle to flat, all while cradling the medicine ball. Once relatively flat, contract to the raised position in the same manner as before but instead grab the medicine ball from your raised legs and hold it in your hands as you flatten out. Repeat this process as your perform reps. |
|
3 - One Arm Front Raise Video Example Hold your arm straight out in front of you with the medicine ball in your palm. Lower your arm down as far as you can while keeping the medicine ball steady. Press up and return to starting position. Optional: If the ball is too heavy or you become tired, use both arms/hands. |
|
4 - Superman Video Example Lay on your stomach with legs and arms outstretched. Hold the medicine ball in your hands and lift your arms and legs off the ground at the same time. Hold for three seconds and return to starting position. Optional: If the ball is too heavy or you become tired, perform reps w/out the ball. |
|
5 - Walking Lunge Twist Video Example Perform traditional lunges with medicine ball in hand. While lunging forward, start to twist your torso toward the same side as your leading leg. As you rise from the lunge, return to your torso to the center and begin the next rep with the alternate foot. Optional: Some people bring both feet together in between alternating feet. It gives you a chance to re-center and get your balance back. Others go straight into the next lunge after rising from the previous rep. Do what feels best for you. |
|
6 - Russian Twist Video Example Sit in a contracted crunch position with a medicine ball in hand. Hold the ball w/ both hands centered in front of your chest. Your legs should be bent at the knee and your body should make a "V" shape w/ your thighs and torso. Bodyweight should be balancing on your butt. Twist from side to side, lightly touching the medicine ball to the ground if possible. Optional: Some people perform this on a raised surface w/ their legs hanging in the air. |
|
7 - Overhead Tri Extension Video Example Stand with feet shoulder width apart. Hold the medicine ball overhead with arms stretched out directly above you. Bend your arms at the elbow while keeping your shoulders steady. This should place the ball behind your head. Extend the arms back to outstretched position. Optional: You can either have your hands under the ball or on the sides of the ball. |
|
8 - Push-Up Roll Video Examples While in push-up position, place the medicine ball under one of your hands. The other hand will remain pressed against the ground. Perform the push-up motion and when back in starting position, take your raised hand off the medicine ball and place it on the ground. Roll the ball over to your opposite hand and place it on top of the medicine ball. Perform another push-up. Keep alternating hands to perform reps. Optional: A more advanced version is to release the medicine ball at the peak of your "up" position and roll it toward your other hand. While doing this, raise your opposite hand in anticipation of the ball arriving and land that hand on top of it. Keep alternating like this in rhythm. Optional: An easier method is to simply perform half your reps on one arm first and then switch over to your other arm. |
|
9 - Wall Sit Squeeze Video Examples Standard wall sit exercise but squeeze a medicine ball between your knees. Optional: If this is too difficult and no lighter medicine balls are available, just hold the medicine ball in your hands above your head. |
|
10 - Overhead Side Bend Video Examples Stand with feet shoulder width apart. Hold the medicine ball overhead with arms outstretched. Keeping arms straight, bend to your right side as far as is comfortable. Return to starting position and repeat on the left side. |
|
11 - One Arm Shoulder Press Video Examples Stand with feet shoulder width apart. Hold the medicine ball in your hand at a 90 degree angle (this will leave the ball close to the side of your head). Press the ball up until your arm is straight over head. Switch arms and repeat. Optional: You can performs several reps w/ one arm and switch to the other to finish. |
|
12 - Burpee Ball Video Examples Holding the medicine ball with both hands. Jump up lifting the ball overhead. Proceed directly to push-up position with the ball under your hands as you stretch your feet out behind you. Bring your feet back to your chest and return to standing position. Repeat. Optional: As with any burpee, you can optionally skip the jump and/or the actual push-up if you become tired or need an easier version. Optional: A more advanced version can include a chest pass instead of a jump up if there is a wall surface available. |
|
|
| Hydrate, Rest and Recover. Good luck!!! |
Tuesday, May 7, 2013
Workout: Mueller Lake Park Circuit 13
Workout: Mueller Lake Park Circuit 13 |

|
Equipment Used:
|
|
Tip: If a partner is not present, many of these exercises can be done
solo or w/ the assistance of a mount point for your resistance band. Be creative! |
Circuit #13 |
|
SUMMARY ***Stretch/Warmup
|
Circuit #13 - Partner Workout |
|
This circuit was created to foster teamwork and camaraderie among our workout group by focusing on partner
exercises. Using a minimal amount of equipment, we utilize a partner to create additional resistance. If you
lack a partner or have odd numbers in your group, the exercises can be modified for solo performance as well.
When choosing partners try to match people who are of similar weight and/or physical ability. While performing
exercises, communicate with your partner to coordinate each movement. Use good form and encourage one another
to give it 100% during the circuit.
Certain exercises may require a slightly longer set to get enough work for both partners. Somewhere between 30 seconds to a minute for most. If you can, bring several different types of resistance bands and medicine balls. You could also use a sandbag or large diameter medicine ball (wall ball) for a couple exercises. Use your imagination and make replacments as needed. You will need a good amount of space to perform the exercises so clear out ample room. All of these exercises are just variations of familiar exercises. Descriptions and video examples are linked below so take time to review them and practice your form before hitting the workout. Good luck! |
Examples |
|
1 - Partner Press and Row Video Example Stand one in front of the other, both facing the same direction connected by two fairly taut resistance bands. As the partner in front presses the handles forward (in a traditional chest press movement), the partner in back will simultaneously pull the handlebars back while squeezing the shoulder blades together (completing a basic row). Switch positions each set. |
|
2 - Rotating Lunge Video Example Standing beside each other far enough apart so there’s some tension between you, each grab one end of the resistance band. Lunge forward with the outside leg while simultaneously rotating away from one another. Press back up and back, switching sides each set. |
|
3 - Tricep Kickbacks Video Example Face off in front of your partner with the right foot in front of the left, holding one end of a resistance band in your right hand. (Your partner will mirror you with the left foot front and the band in the left hand.) Bend forward at the hips with the knees slightly bent, and slowly straighten the arm in unison to pull back the band. Return to start. Switch arms each set. |
|
4 - Sit-Squat Hand-Off Video Example Stand facing your partner, arms’ distance apart, in a squatting position with feet and knees shoulder width apart. Squat down until your thighs are parallel with the ground (or as close as you can get). Hand off a weighted ball back and forth. |
|
5 - External Rotator Cuff Rotation Video Example Stand side-by-side with your partner, facing the same direction. Hold one handle of the resistance band with your outside arm with your elbow bent at 90 degrees, anchored at the waist. Slowly rotate your forearm away from the body. Switch arms each set. |
|
6 - Mid-Row Squat Video Example With two tubes twisted around one another, stand facing your partner far enough apart that the tubing is taut. Lower in a squat position with the core engaged and back flat. Maintaining the squat (and the burn!) bring the elbows straight back with the palms facing in, and squeeze the shoulder blades together. Return to start position, counting it out with your partner until you reach your desired goal. |
|
7 - Sit-Ups Pass Video Example Start seated on the floor facing your partner, with feet touching and knees bent. Holding the medicine ball to your chest, both recline to the floor, come back up, and pass the ball to your partner. |
|
8 - Lunge to Chest Pass Video Examples Grab a medicine ball and face your partner, standing about 5 feet apart. Lunge forward and chest pass to your partner. They’ll then catch it and head straight into their lunge-and-pass. |
|
9 - Push-Up with Shoulder Tap Video Examples Face your partner in push up position (go to your knees if you need). Lower into a push-up. Push back up to the starting position, then lift your right hand, and tap your partner on the left shoulder (while your partner does the same thing). Repeat tapping the other shoulder. |
|
10 - Overhead Pass with Squat Video Examples Stand back-to-back with your partner; legs shoulder width apart holding a medicine ball. Lower into a squat position and as you return to standing, press the ball over head. Your partner then reaches up and grabs it. Repeat the motion passing the ball back and forth. |
|
|
| Hydrate, Rest and Recover. Good luck!!! |
Tuesday, April 30, 2013
Workout: Deer Park Circuit 1
Workout: Deer Park Circuit 1 |

|
Equipment Used:
|
|
Tip: This workout can be done on any set of stairs. |
Circuit #1 |
|
SUMMARY ***Stretch/Warmup
|
Circuit #1 - Bleacher Workout |
|
This workout is very similar to the
plyo/iso workout. This time we are using a set of bleachers to provide an added
challenge to the workout. For y'all attending the workout here in Austin, please note that
the location is not Mueller Lake Park but Deer Park Middle School (address/directions at the
bottom of the page). This workout can be done anywhere w/ a set of bleachers however. If
bleachers aren't available, anywhere w/ a sturdy raised surface that will support your
weight will do. If bleachers are available, try to find a set that is solid and doesn't have
gaps that your foot can slip into. We don't want you out there getting hurt!
Your bodyweight is sufficient enough to use for this workout but if you want an additional challenge, I recommend using some form of added weight. I recently bought a set of K Bands and they work great. You just attach them to your thighs & go about your normal workout. A set of comfortable ankle weights and/or a weighted vest would work too. The workout does include upper body and a tiny bit of abs but it is primarily legs and cardio. Be sure to stretch appropriately. The order of this workout is setup to travel around a set of bleacher stairs. Certain exercises are done in place wherever you happen to be. Others are done while moving either up or down the stairs. All bleachers are different and you may have to skip a step or two when performing up/down exercises if the stair width is really small. You can also travel up/down the bleacher seats themselves if it seems safe. Pay special attention to your footwork and try not to trip (especially when fatigued). Try to avoid using the railing for things like push-ups or wall sits unless you are absolutely sure it is sturdy. A great portion of these exercises have not been used here before. Video examples are linked below so take time to review them and practice your form before hitting the workout. Good luck! |

|
Examples |
|
Alternating Toe Taps: Click For Video Example Wall Sit Kicks: Click For Video Example Walking Push Ups: Click For Video Example Stair Lunges: Click For Video Example Side Squats: Click For Video Example Side Plank: Click For Video Example V Ups: Click For Video Example Calf Raises: Click For Video Example Bulgarian Split Squats: Click For Video Example Bleacher Burpees: Click For Video Example Single Leg Step Ups: Click For Video Example Single/Double Leg Hop: Click For Video Example Tricep Dips: Click For Video Example Bleacher Crawls: Click For Video Example |
|
DIRECTIONS Deerpark Middle School (North Austin) Address: 8849 Anderson Mill Rd Austin, TX 78729 Find your way to Anderson Mill Road and either turn in one of the service roads or use Turtle Rock Rd to access the school.On the map picture below, the red "X" marks the location of the track. The school is an open campus and accessible 24/7. There is a circular paved track w/ a set of bleacher next to it. We should be gathered near the bleachers. |

|
FROM SOUTH AUSTIN
|
|
FROM NORTH AUSTIN Toll Road
|
FROM CEDAR PARK
|
| Hydrate, Rest and Recover. Good luck!!! |
Thursday, April 25, 2013
Workout: Mueller Lake Park Circuit 12
Workout: Mueller Lake Park Circuit 12 |

|
Equipment Used:
|
|
Tip: Get creative! Even if you don't have the equipment listed, find suitable
replacements. |
Circuit #12 |
|
SUMMARY ***Stretch/Warmup
|
Circuit #12 - Station Workout |
|
This workout is our first true "circuit". A circuit is defined as a line, route,
or movement that starts and finishes at the same place. Generally our workouts
involve everyone performing the same exercise/movement simultaneously but we
decided to switch things up. By introducing some new equipment, our hope is to
inject some fun into the circuit and provide new challenges for our muscles. This
equipment can either be purchased from your local sporting goods store or created
from other objects. You can search the web for instructions on how to make DIY
workout equipment (i.e. creating sandbag from a duffel bag, trash bag and sand).
Before starting, set out the equipment needed at each "station". Take time to make sure each item is in good working order and become familiar with the form needed to perform your exercises. Using a timer/stopwatch, we want to spend a set amount of time at each station (i.e. 20-30 seconds) and then move onto the next. Once we circle back around to the first station, take a break and grab some water. Then start the process over. Repeat until sufficiently tired! Try to keep your intensity up when moving through the stations. The order of this circuit is setup to be convenient for our park location. Feel free to change up the order to suit your needs. We generally try to rotate body parts (upper, lower and abs) to give each one at least one break before hitting it again. We also tried to provide alternate exercises for those that may be too difficult for some. Make adjustments to the workout plan to suit your individual needs. A great portion of these exercises have not been used here before. Video examples are linked below so take time to review them and practice your form before hitting the workout. Good luck! |
Examples |
|
Hammer Swing: Click For Video Example Alternate Ropes: Click For Video Example Box Jumps: Click For Video Example Step-Ups: Click For Video Example Pull-Ups: Click For Video Example Back Row: Click For Video Example Medicine Ball Russian Twist: Click For Video Example Sandbag Squat Press: Click For Video Example Resistance Band Punch: Click For Video Example Resistance Band Press: Click For Video Example Ab Rollout: Click For Video Example Plank: Click For Video Example Push-Up: Click For Video Example Jump Rope: Click For Video Example Lunge Twists: Click For Video Example |
| Hydrate, Rest and Recover. Good luck!!! |
Subscribe to:
Comments (Atom)